Oreo balls are a super easy and downright irresistible 4-ingredient chocolate treat you can make at home. Choose regular, golden, or another flavor of Oreo cookies, mix with a little cream cheese, and use white or dark chocolate for coating each ball. Keep them plain or add some chocolate drizzles, festive sprinkles, or crushed Oreo cookies—they disappear off your dessert tray no matter how you decorate!

I’ve had a recipe for golden Oreo truffles on my website since 2012 and decided to turn it into an Oreo Balls post filled with different flavor ideas, decorating options, and all of my candy coating success tips. That’s what you’ll find today!
Here’s Why You’ll Love These Easy Treats
- You need just 4 ingredients
- No baking involved (save your oven for sugar cookies!)
- Like a chocolate truffle with a soft, rich Oreo cheesecake filling
- Choose your flavor of Oreo
- Choose white or dark chocolate for coating (or both!)
- Keep them plain, or decorate them for a holiday or theme

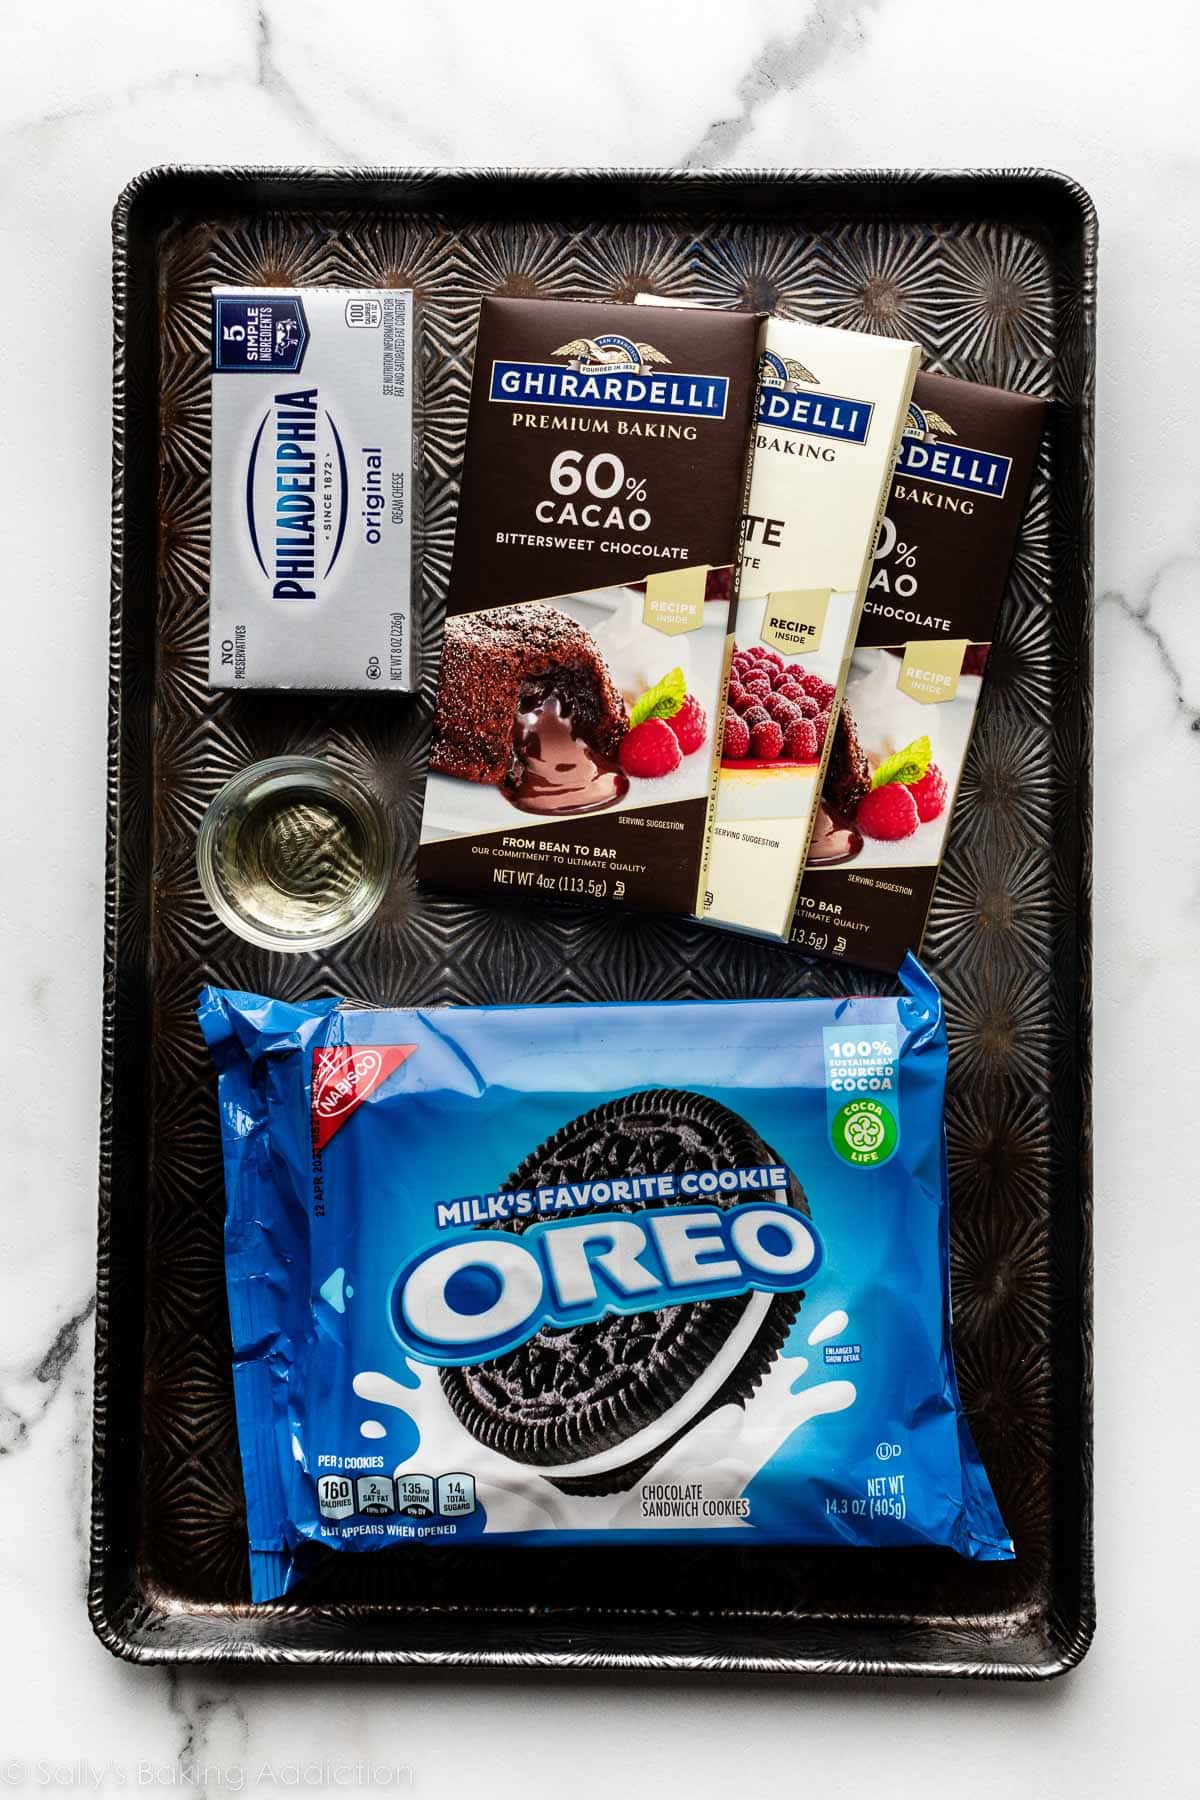
What Are Oreo Balls Made of?
- Oreo Cookies: For this recipe, we’re using 36 Oreo cookies. The type/flavor of Oreo makes a difference, as the amount of cream filling can vary—more on this below.
- Cream Cheese: 1 standard package (8 ounces/225g) of block-style cream cheese, not the spreadable kind from a tub. Let it soften to room temperature so it will mix easily with the Oreo crumbs.
- Melted Chocolate: Using real chocolate (not candy melts) for coating makes for the best-tasting, richest Oreo truffles. Chop up high-quality bars of baking chocolate. Do not use chocolate chips—the stabilizers in them prevent them from melting smoothly.
- Vegetable Oil or Coconut Oil: Just a small amount of oil mixed in with the chocolate thins it out to make it easier to dip/coat the Oreo balls.
Let Me Show You How to Make These Easy Candies
Just like when making an Oreo cookie crust, a food processor or blender grinds the Oreo cookies into fine crumbs. If you don’t have one, you can place the Oreos in a plastic zipped-top bag and crush them with a rolling pin. The whole cookie, cream filling and all.
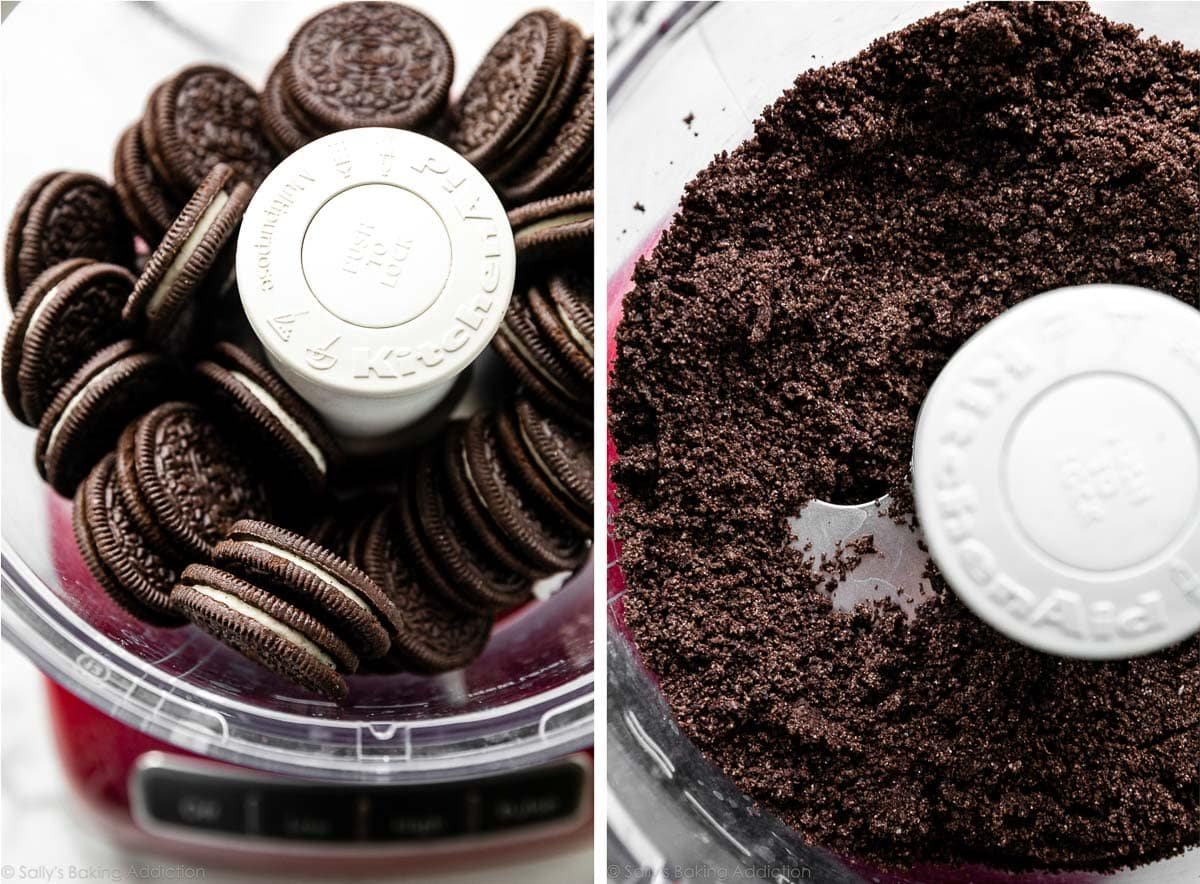
Pulse until there are no more big chunks. Fine crumbs, like what is pictured above. ↑
Combine the crumbs with softened cream cheese. You can do this with a stand mixer or a hand mixer; or even just do it all in your food processor, if it’s large enough to accommodate the Oreo crumbs plus the cream cheese.
Next, scoop the mixture and roll into balls. You can use a cookie scoop for this, but I usually just use a Tablespoon. Scoop about a Tablespoon of the Oreo truffle filling (about 18–22g), and use your hands to roll it into a ball. The mixture is very wet, but should still be roll-able. If it seems overly wet, refrigerate the mixture for 15 minutes and then try again.
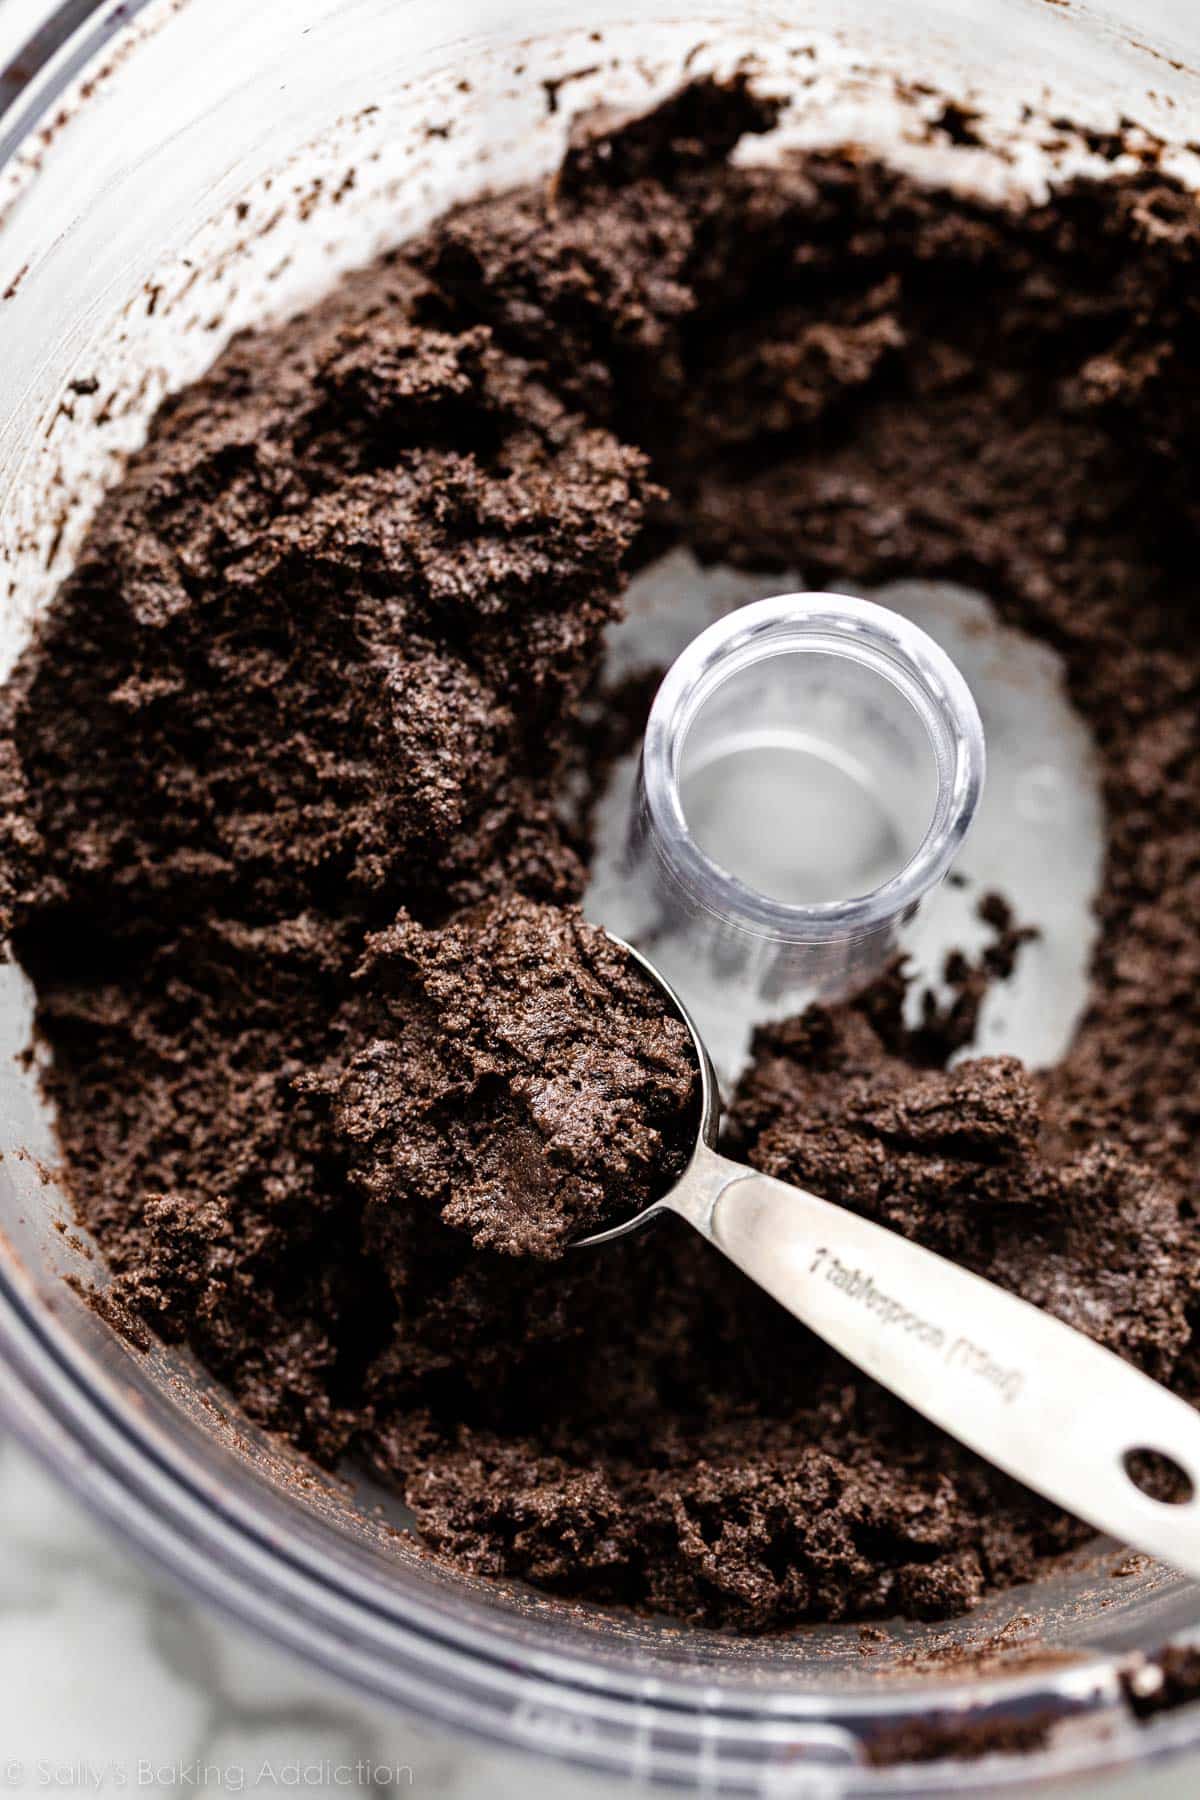
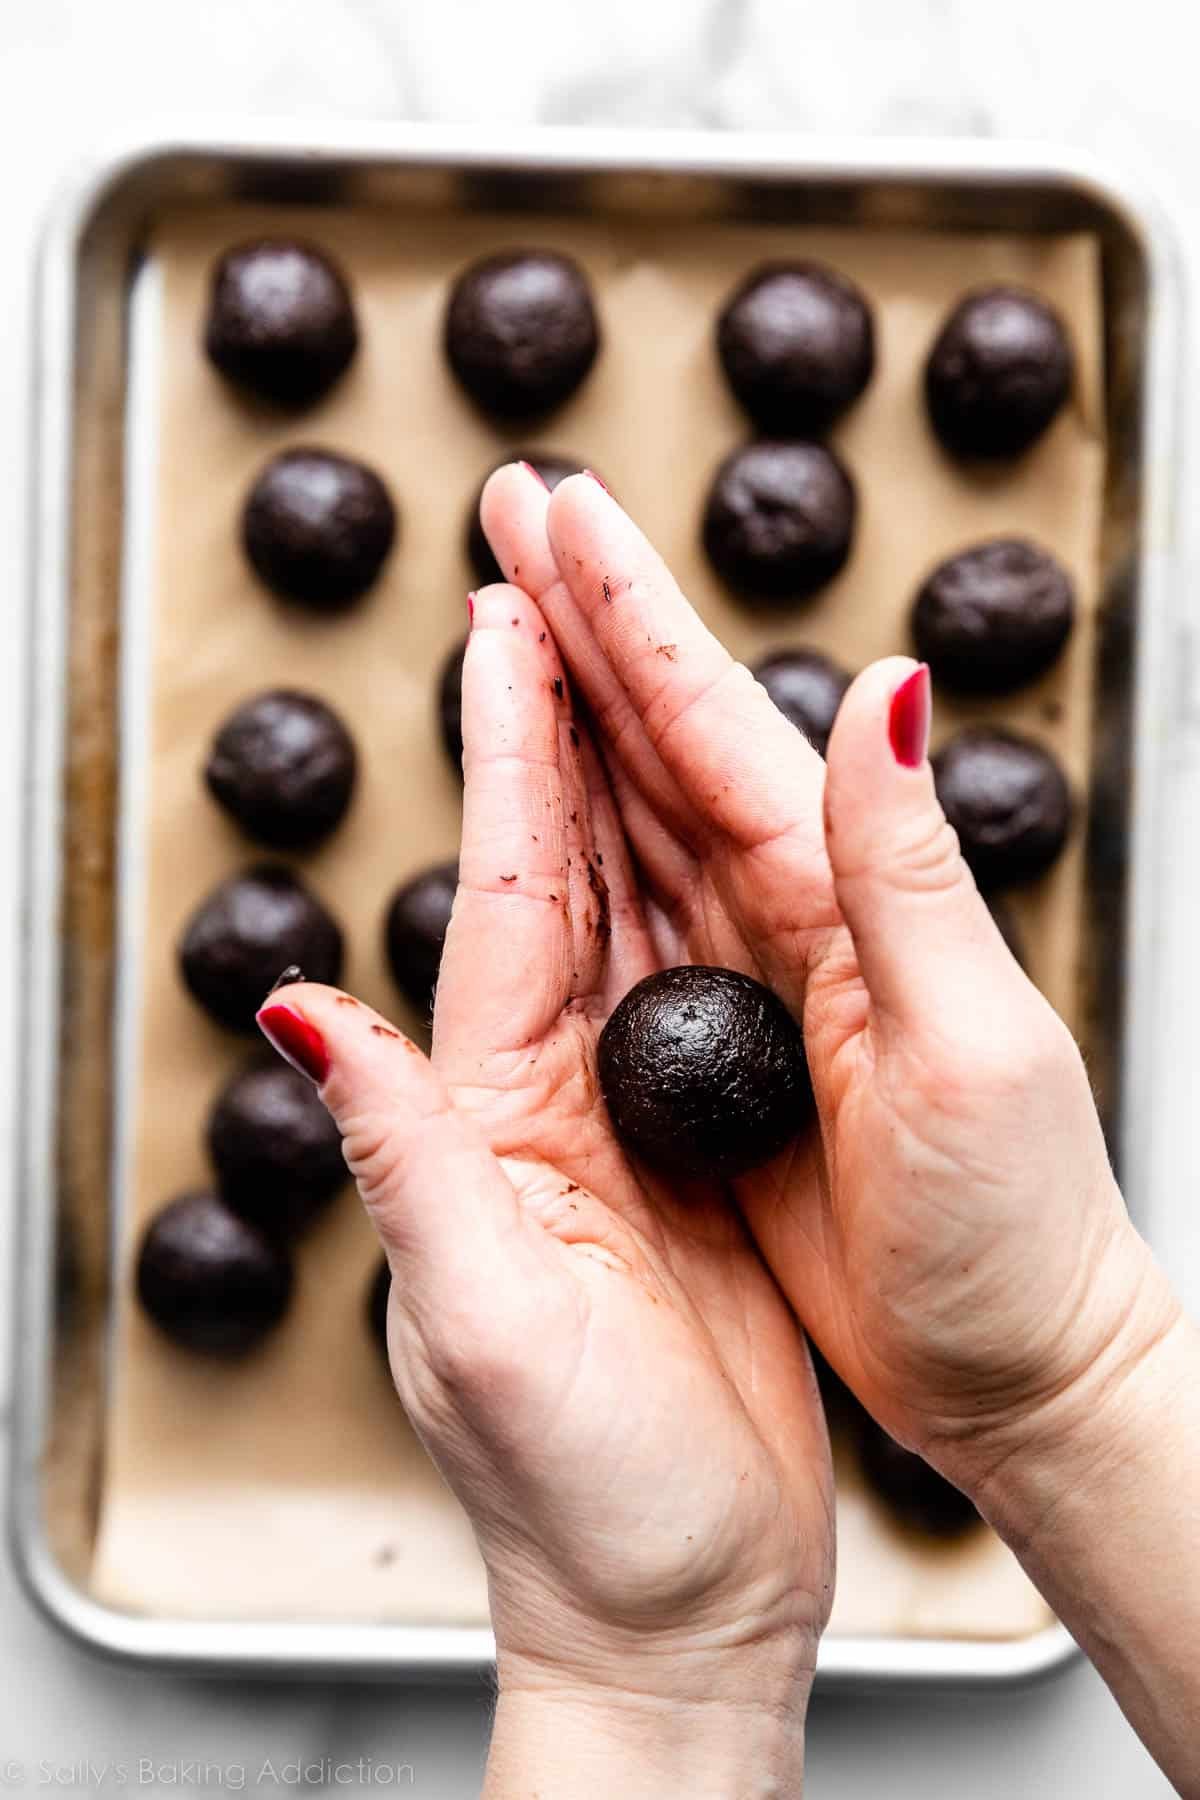
Place the Oreo balls on a plate or small baking sheet lined with parchment paper and place the tray in the refrigerator for at least 1 hour, or in the freezer for 30 minutes. You could also make these a day ahead and refrigerate, then dip them the next day.
- Why do we chill the Oreo balls? You want the truffles cold and solid as you dip them into chocolate. If they are room temperature or still soft, they will fall apart in your warm melted chocolate.
If you can, keep half of them in the refrigerator while you start dipping the other half in chocolate, because they can soften up quickly while sitting out. This makes coating them in chocolate a lot easier.
What Types of Oreos Are Best to Use for These Truffles?
There are now many, many varieties of the iconic Oreo. But they don’t just vary in color and flavor; they can vary in size and amount of cream filling, too—so the type of Oreo you use to make Oreo balls does make a difference. Here’s my advice:
- In general, stick with classic Oreos, not Double-Stuf; like with an Oreo pie crust, the extra filling makes the crumb mixture too greasy and wet and difficult to form.
- Some flavors have extra filling without declaring “Double-Stuf” on the package. For example, regular and Golden Oreos weigh the same, but Mint Creme Oreos weigh more because they have more filling. But my team and I have tested mint Oreo truffles, and they are still doable… and delicious.
I usually get a lot of questions about dipping candies, and after writing an entire cookbook about candy, I have some advice that you might find helpful.
Let Me Show You How to Dip Oreo Balls
- Start with real chocolate. For the best-tasting Oreo truffles, use real chocolate, like the 4-ounce “baking chocolate” bars found in the baking aisle of the grocery store. (I like Baker’s, Ghirardelli, Lindt, and Guittard brands.) Do not use chocolate chips. They’re great for chocolate chip cookies, but since they contain stabilizers, they do not melt into the correct coating consistency. Candy melts would work, but they don’t taste like real chocolate, so use your best judgement.
- Add 1/2 teaspoon oil. Place your chopped chocolate in a glass bowl or liquid measuring cup, and add a little oil (vegetable or coconut oil). The oil is optional, but I always include it because it thins out the melted chocolate and makes dipping/coating easier (oil is an ingredient in candy melts).
- Melt the chocolate. Whether you’re using white or dark chocolate, the melting process is the same. You can use a double boiler or the microwave. Microwave the chocolate with the oil in 20-second increments, stirring after each, until smooth. Chocolate can overheat easily, which is why we microwave it in short bursts. I do not recommend tempering the chocolate for this recipe. Tempered chocolate should not be refrigerated, and these Oreo balls must be refrigerated.
- Let the chocolate cool down for about 5 minutes. Otherwise it will melt the cold filling.
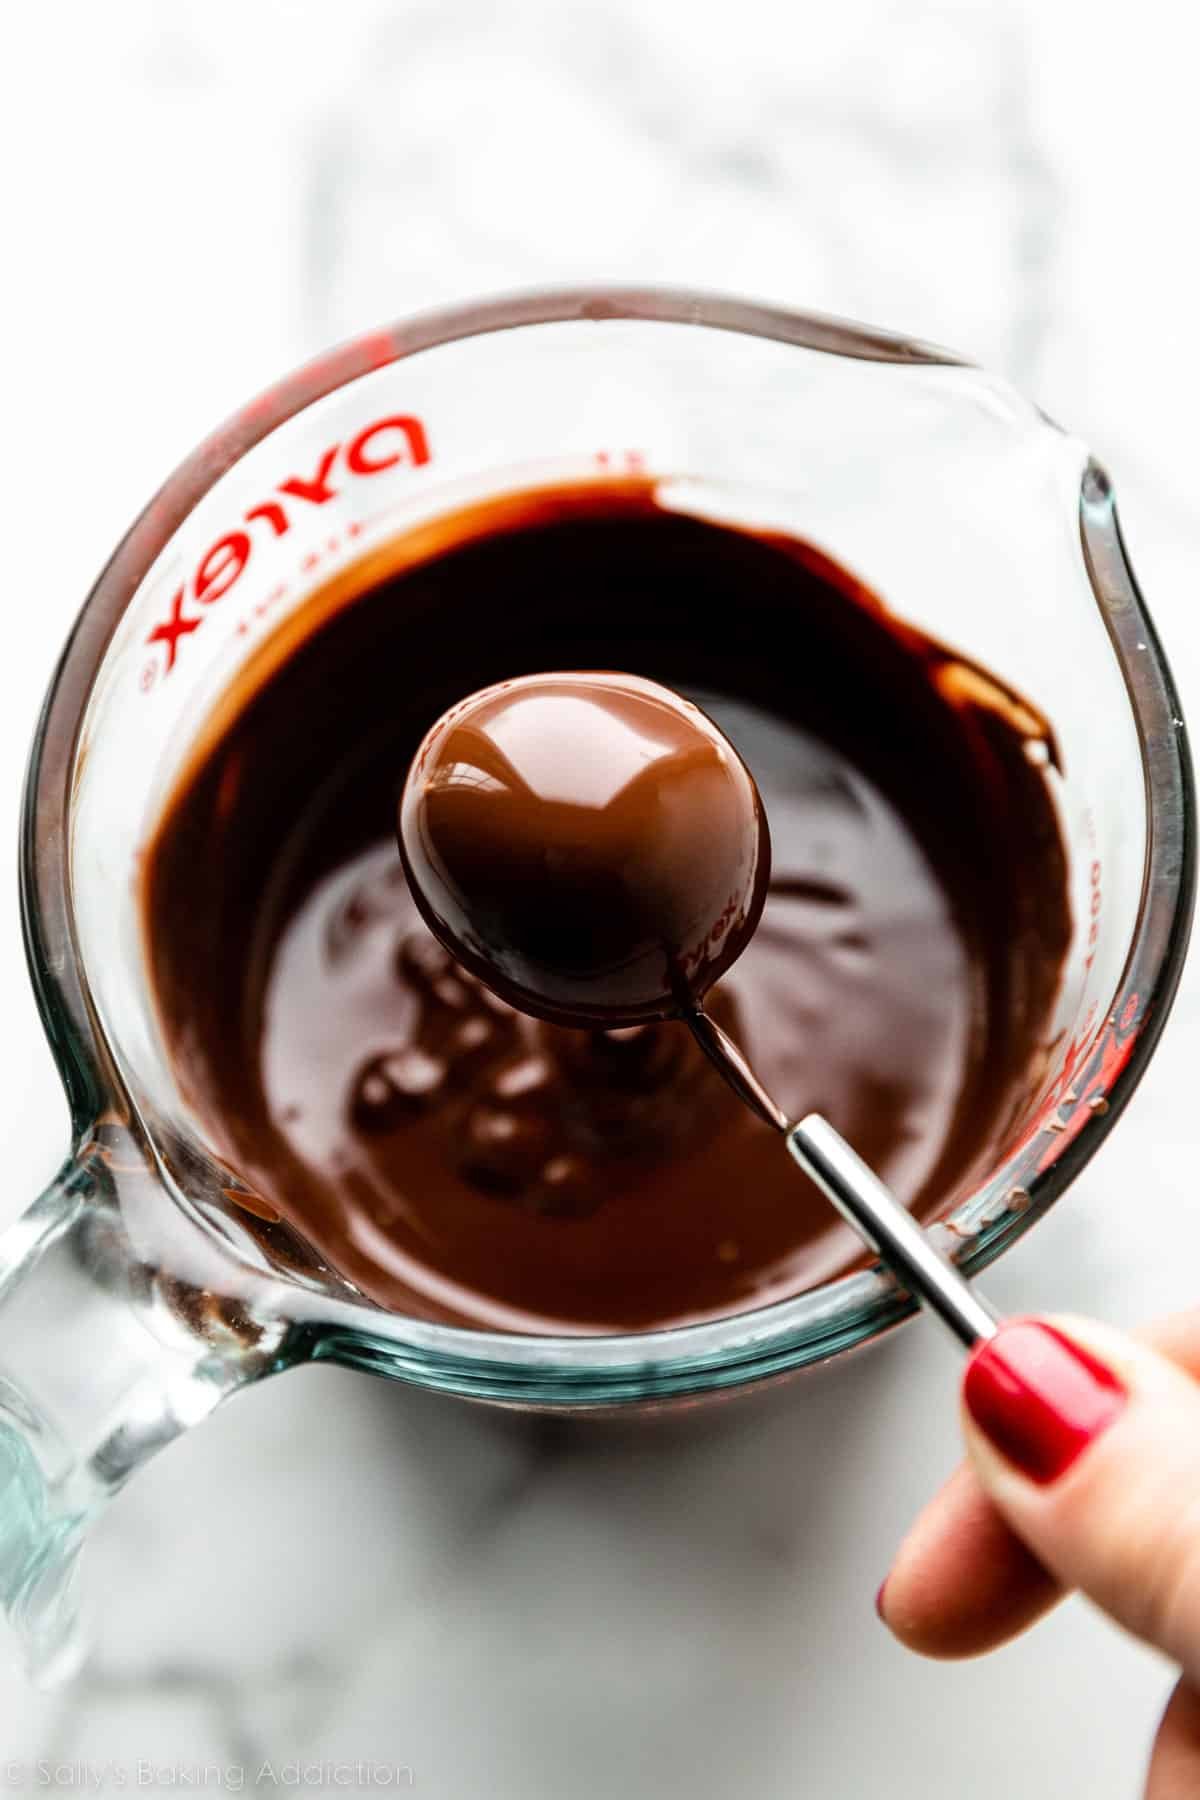
- Dip the Oreo truffles. Drop a chilled Oreo ball in the melted chocolate and swirl it around to coat. I make a lot of truffles and always use this handy candy dipping tool, which is perfect for dipping round treats like chocolate truffles. Chances are you don’t have one of those, so a fork and a toothpick work too! Pick up the truffle with the fork—do not pierce it, simply lift it up on top of the fork’s prongs. Tap the fork on the edge of the bowl to allow the excess chocolate to drip off. Use a toothpick to slide the truffle off the fork and onto a baking sheet lined with parchment paper.
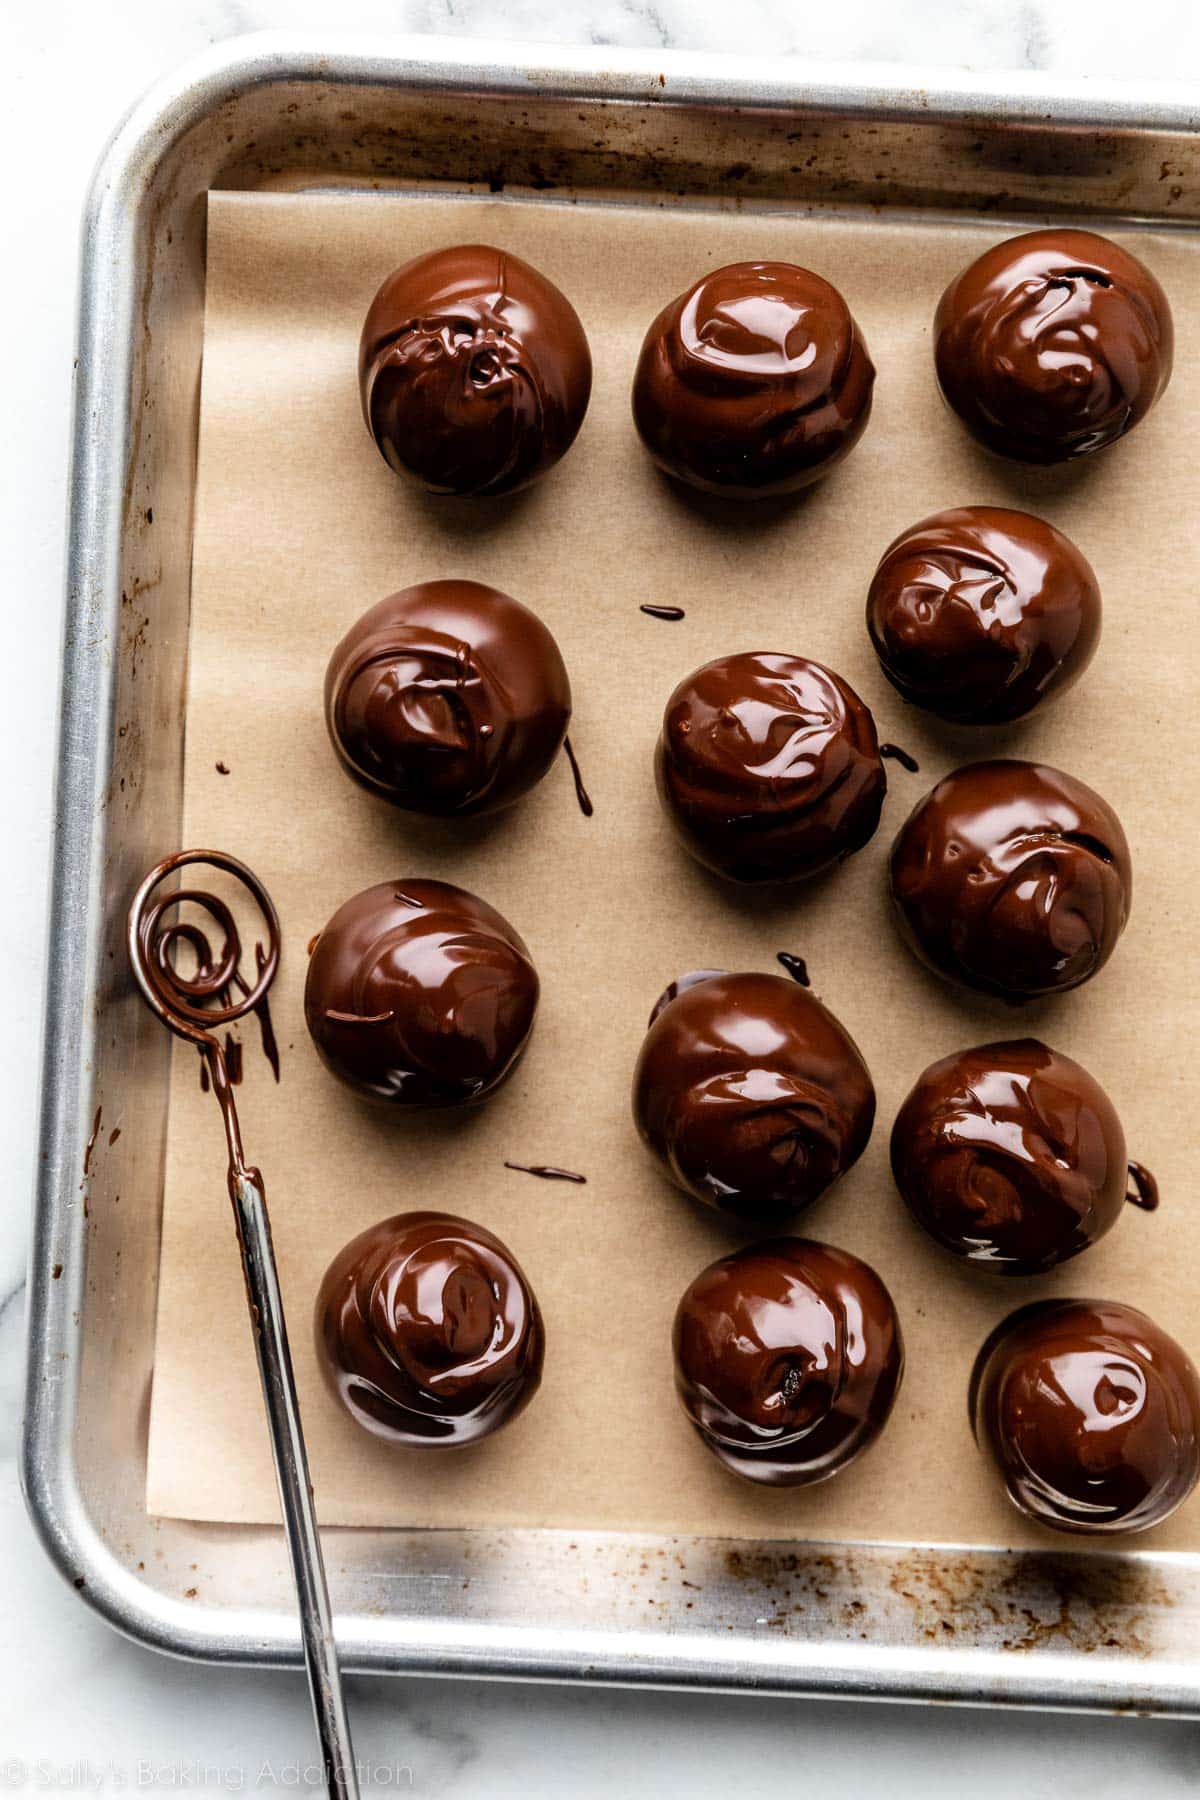
- Allow the chocolate to set. If you have leftover chocolate, you can drizzle it on top of the Oreo truffles—you can use a spoon or squeeze bottle for that. Or top with sprinkles or Oreo crumbs while still wet. Place the baking sheet in the refrigerator to set the chocolate.

Troubleshooting & Success Tips
If dipping these Oreo balls into chocolate is giving you some problems, here are some suggestions:
- Chocolate is hardening before I’m finished: This is an easy fix! First, make sure you are working quickly. Second, keep the chocolate fluid by reheating in the microwave for 10 seconds or use a double boiler. If you don’t have a double boiler, spoon the chocolate into a glass bowl set over a pot of simmering water. This keeps the chocolate slightly warm. Don’t let the water touch the bottom of the glass bowl.
- Chocolate is too thick: A little bit of oil thins out the chocolate so it’s the best consistency for dipping. If you find your chocolate is still too thick, add another 1/4 teaspoon of oil.
- Oreo balls are falling apart: The chocolate is too hot. Let the chocolate sit for a few minutes to slightly cool down and then try again.
- Uncoated candies are losing their shape: If the Oreo balls are softening and losing their shape as you’re dipping them, put them back in the refrigerator or freezer for 5–10 minutes and then try again. If you can, keep half of them in the fridge/freezer while you start dipping the other half in chocolate, because they can soften up quickly while sitting out.
Optional Garnishes – Have Fun!

Description
For these easy no-bake treats, combine crushed Oreos with cream cheese and form into balls before dipping in melted chocolate. Decorate with sprinkles or a drizzle of white chocolate for extra flair. Everyone loves these and they are so easy to make!
- Make the Oreo truffle filling: Place the Oreos (the entire cookies, filling and cookie) in a food processor or blender. Pulse into a fine crumb.
- Using a hand-held or stand mixer fitted with a paddle attachment (or just continue using the food processor if it’s large enough), beat/pulse the Oreo crumbs with the softened cream cheese until combined.
- Using a Tablespoon, scoop out a spoonful of the mixture (about 18–22g each) and, using your hands, roll into a ball. Place balls on baking sheets or plates lined with parchment paper. If the mixture is too sticky, refrigerate for 15 minutes before rolling into balls. Cover and refrigerate the balls for at least 1 hour and up to 3 days. If you’re in a rush, cover and freeze the balls for 30 minutes. (Do not freeze much longer than that, unless you transfer them to the refrigerator after 30 minutes.)
- Melt the chocolate: Place chopped chocolate in a glass bowl or a 2-cup liquid measuring cup—its depth makes dipping really easy. Melt in 20-second increments in the microwave, stirring after each increment, until completely melted and smooth. You can also melt the chocolate using a double boiler, or a heatproof bowl placed over a pot of simmering water. Stir constantly until melted. Let the warm chocolate sit for 5 minutes to slightly cool before dipping, otherwise it will melt the shaped Oreo balls.
- Coat the Oreo balls: Working with one Oreo ball at a time, submerge into the melted chocolate and swirl to coat; carefully lift out using a fork or dipping tool. Tap the fork/tool gently on the side of the bowl/measuring cup to let excess chocolate drip off. Use a toothpick to help slide the truffle off of the fork and onto a lined plate or baking sheet, or, if using the candy dipping tool, turn upside down to release.
- Optional garnishes: If desired, top with sprinkles or Oreo crumbs while the chocolate is still wet. If you have leftover or another melted chocolate, use a spoon or a squeeze bottle to drizzle it across the tops of the dipped truffles.
- Refrigerate balls for at least 1 hour to allow the chocolate to set before serving. Once chocolate is set, you can store them in an airtight container in the refrigerator, layered with parchment or wax paper, for up to 2 weeks.
Notes
- Make Ahead & Freezing Instructions: You can start this recipe 1 day ahead of time. The shaped balls can be chilled in the refrigerator for up to 3 days prior to coating with chocolate. You can freeze the finished Oreo truffles for up to 2–3 months. Thaw overnight in the refrigerator.
- Special Tools (affiliate links): Food Processor (I also love this one) | Baking Sheets | Silicone Baking Mats or Parchment Sheets | Liquid Measuring Cup | Candy Dipping Tool | Squeeze Bottle
- Oreos: My team and I have tested this recipe with regular, Golden, and Mint Creme Oreos. This recipe is for 36 standard-size Oreo cookies. Do not use Double-Stuf. Peanut butter flavored Oreos also work well.
- Cream Cheese: Use block-style cream cheese, not the spreadable kind that comes in a tub.
- Chocolate: For the best looking and tasting Oreo truffles, use 4-ounce (113g) “baking chocolate” bars found in the baking aisle. I prefer Baker’s, Guittard, or Ghirardelli brands. You need 3 4-ounce (113g) bars for this recipe, 12 ounces (339g) total. You can use milk, semi-sweet, bittersweet, or white chocolate. You could also use chocolate melting wafers, such as Ghirardelli brand. Candy melts work too, but they don’t taste like real chocolate. Do not use chocolate chips because they contain stabilizers preventing them from melting into the correct consistency for coating.
- Oil: I melt the chocolate with a small amount of oil to thin it out and make it easier to coat the Oreo balls. You can use vegetable or coconut oil.
- Coating/Melting Chocolate: See all my troubleshooting tips above in the post.
- Do Not Temper: I do not recommend tempering the chocolate for this recipe. Tempered chocolate should not be refrigerated and due to the cream cheese in the filling, these truffles must be refrigerated.
Subscribe
Baking Made Easy
Are you new to this website? This email series is a great place to start. I’ll walk you through a few of my most popular recipes and show you exactly why they work.
Stay connected with us on social media platform for instant update click here to join our Twitter, & Facebook
We are now on Telegram. Click here to join our channel (@TechiUpdate) and stay updated with the latest Technology headlines.
For all the latest Food and Drinks News Click Here
