In addition to the Hierarchy of Needs Exotic bow and The Manticore Exotic SMG, Destiny 2’s Season of the Seraph brings a new Exotic pulse rifle called Revision Zero. Revision Zero’s intrinsic trait makes it strong against Barrier Champion’s with its shield-piercing ammo. It also gathers target data from precision kills that lets you temporarily swap for a high-damage scope. Completing The Hidden Shape quest steps will give you Revision Zero and its weapon pattern for shaping it.
First, continue Season of the Seraph’s Week three questline–called More Than A Weapon–and at Step 22 of the quest, you must speak with Elsie Bray at the Holoprojector. Accept The Hidden Shape Exotic quest and complete the Operation: Seraph’s Shield mission–which you can access from the H.E.L.M. and is set at Power level 1580 for Normal mode. This mission doesn’t have matchmaking, so you can complete it solo.
Operation: Seraph’s Shield Mission Guide
Once at the facility entrance, avoid tripmines and head further into the facility. Defeat the Scanner Splicer to get the Scanner Augment, a mechanic that should be familiar from the Deep Stone Crypt raid.

The Scanner augment reveals which console to hack by its yellow-highlighted grid pattern. Hack the three consoles in this room to activate the escape pods. Once at the Engineering Sector, go to the Augmentation Terminal to remove the Scanner augment to unlock the door. Defeat another Scanner Splicer and hack the console nearby, the one through the vent, and the last console by the door. Once you’re through, use the Augmentation Terminal again.
Remember, you’ll encounter the Scanner, Operator, and Suppressor augments. The augments are for specific tasks:
- The Scanner: lets you hack yellow consoles.
- The Operator: shows red control panels to shoot at.
- The Suppressor: has you damage a target enemy while standing beneath blue spherical drones.
- Augmentation Terminals let you switch between augments or unlock doors.
Access the Decontamination Chamber
In the large yellow room, grab the Scanner augment from the Splicer Vandal. The first console is by a pillar near the entrance. For the next one, go through the vent that’s opposite the pillar–which leads you to a room full of lasers protecting the second console. Finally, use the Terminal to open up another room. Run up the stairs and hack one of the diamond-shaped panels to unlock a vertical room full of turrets.
Access the Security Protocol Puzzle Room
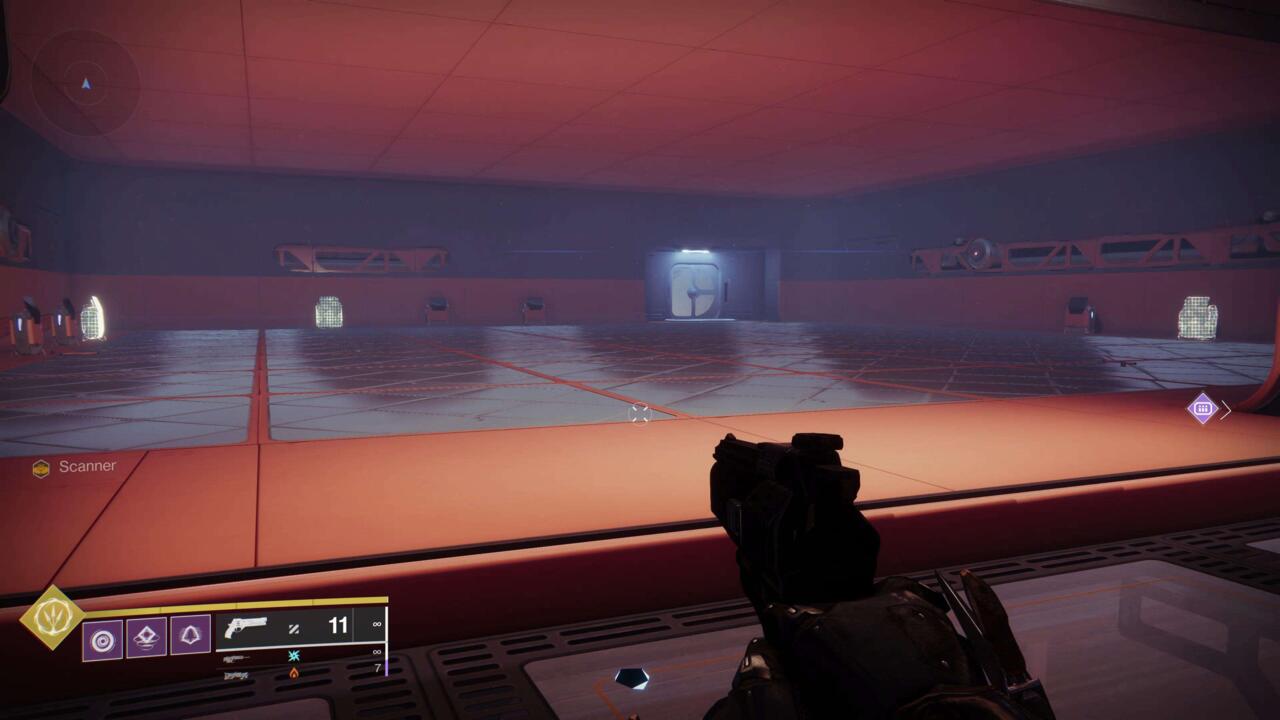
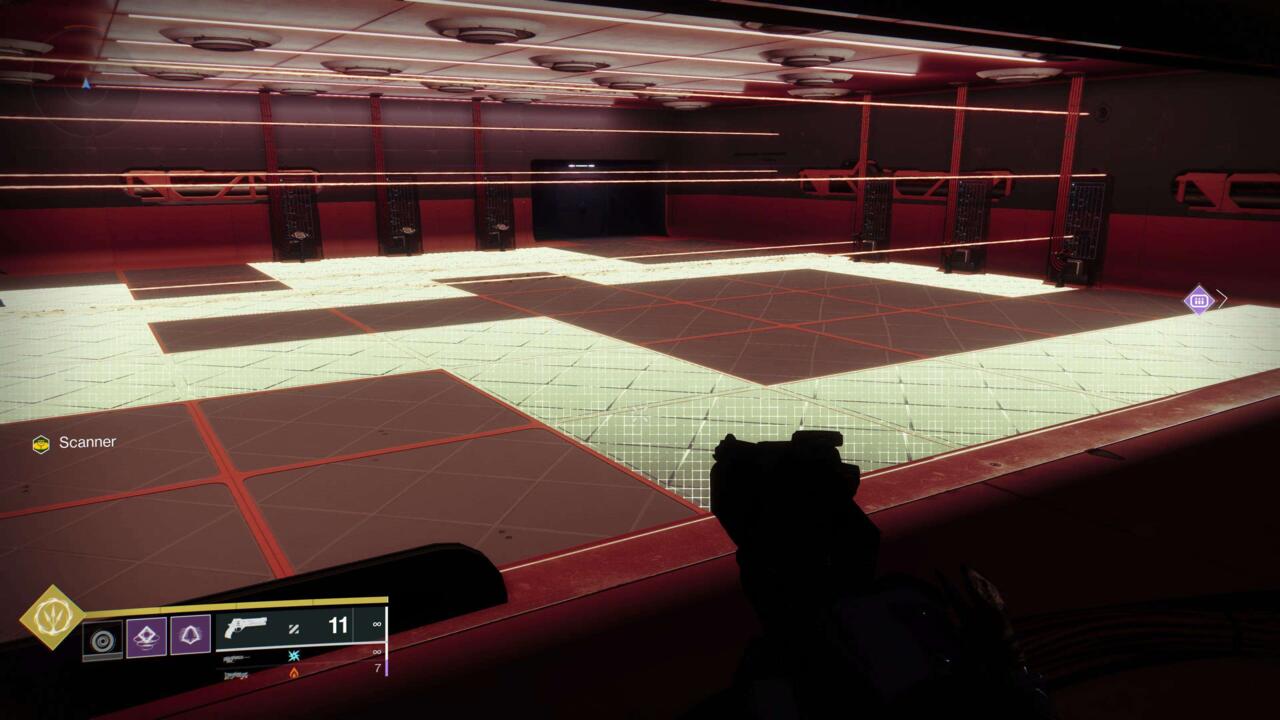
Defeat the Splicer Vandal once again to grab the Scanner. With the Scanner, look into the square puzzle room from the top window to spot the three glowing consoles.

Make sure to hack the consoles from left to right, which were: Far back panel on the left side wall, the leftmost panel on the back wall, and the center panel on the right wall. If your pattern appears to be different from this image, then take a screenshot or photo to help you! The patterns change when running this mission multiple times.

The bottom window reveals the tile pattern you need to walk on, and stepping onto the wrong tile of the 7 x 7 grid will burn you up. If you have teammates, someone can help you navigate the puzzle room, but if you’re running solo, this guide provides useful screenshots.
Access the Officer’s Lounge
This time, grab the Operators augment, which shows red glowing control panels placed on walls that unlock doors. Shoot the control panel in the red-lit section of the room, and proceed to the next area while defeating enemies. Then, follow the vent to shoot the second Operator panel. Return to the previous room, and walk through another vent to access an orange room with Hive enemies to shoot the last control panel for this area. The control panel is in a separate room but can be shot at through the window opening.
Haroktha Boss Fight
Make your way to the cyan room to acquire the Warsat Control Nexus keycard from the Fallen Security Officer Captain and enter the battle with Haroktha, Scourge of the Helium Drinkers. In this intentionally incomplete fight, damage the Hive boss Haroktha until it disappears. Also defeat the Hive enemies, three yellow-bar Brigs, and remaining Fallen enemies.
According to the plan, the Guardian needs to get captured. When you reach a dead end, “Surrender” weapons and gain ship access to the outside of the station. When you reach outer space, carefully jump down onto the catwalks and make your way to the Operator Vandal. Shoot the three glowing control panels in the area to open up additional platforms. When at the next Terminal in the Logistics Sector, open the door, and defeat Haroktha.
Access the Warsat Command Nexus
In this tiny room, use the Operator augment for the control panel at the center. Place the Operator at the open Augmentation Terminal, and then grab the Scanner from the Splicer. Hack the console in that room. After that, place the Scanner into the Terminal, and grab the Operator again to shoot the other control panel at the center. Return the Operator to the Terminal, and find another Scanner to hack the second console. If you’re doing this solo, you can switch between Scanner and Operator through the Terminal and grab the augment from the Vandals.
With the yellow room unlocked, shoot the control panel hanging from the ceiling with the Operator. Get the Scanner and hack the console nearby, which opens up the transmat.
Praksis, The Defiled Boss Fight
For the boss fight, you will need to use the Suppressor mechanic. First, get the Suppressor augment from the Vandal on the catwalk. To use the Suppressor augment, stand underneath the spherical drones and damage the glowing blue, immune enemy–the drones will turn sideways and have a golden glow when activated. Then, shoot the exposed red shield drones to remove the enemy shield.
Praksis’s health bar is divided into three parts. Dealing a third damage to the health bar triggers the Suppressor mechanic. One by one, stand beneath the three spherical drones and target Praksis. Then, shoot the exposed red shield drones on the right, left, and center of the room to remove the Praksis’s shield for the damage phase–it’s best to use something that deals a lot of damage quickly, like a grenade launcher or rocket launcher since the room will be flooded with red-bar enemies.
Once you defeat Praksis, upload the Virus to complete the mission.
The Hidden Shape Quest – Shaping Revision Zero
After completing Operation: Seraph’s Shield, visit the Exo Frame at the H.E.L.M. to get the Revision Zero Exotic pulse rifle. Using the weapon, defeat enemies to get its Deepsight Resonance for its weapon pattern.

Once you’ve collected the Revision Zero weapon pattern, shape it at the Mars Relic–which requires 7 Resonant Alloy, 15,000 Glimmer, and 750 Resonant Elements. Finally, commune with the Relic Conduit to complete the quest. To shape Revision Zero Exotic catalysts, you’ll need to do the Should You Choose to Accept It quests in later parts of the More Than A Weapon questline, and complete the Operation: Seraph’s Shield mission on Legend mode, which caps your Power at 1580 and places additional modifiers.
The products discussed here were independently chosen by our editors.
GameSpot may get a share of the revenue if you buy anything featured on our site.
Stay connected with us on social media platform for instant update click here to join our Twitter, & Facebook
We are now on Telegram. Click here to join our channel (@TechiUpdate) and stay updated with the latest Technology headlines.
For all the latest Gaming News Click Here
