The Raspberry Pi 4 is a versatile machine that can do so much more than its diminutive size would have you believe. You can run a retro gaming machine, set up a home server, perhaps networked storage, media server or even an open-source robot. Lately, though, there has been a massive shortage of Raspberry Pi machines. The non-profit making these machines has assured its patrons that the crisis is ending soon and the computer will be available freely. Fingers crossed for that. With a Pi, you need to invest in a case; considering how rare these machines are, it makes sense to buy a good case that will enhance its capabilities.
If you have ever seen a Raspberry Pi before, you will notice that it comes without a case. It is just a slab of electronic goodies stuffed into a cardboard storage box. It doesn’t come with a power cable, a microSD or a mini-HDMI cable, all the things you will need to run it. Rather than this being a flaw, it is actually a feature that lets you customise your Pi that can be unique to your use case. Speaking of cases for the Pi, there are thousands of options; some are better than others.
Raspberry Pi
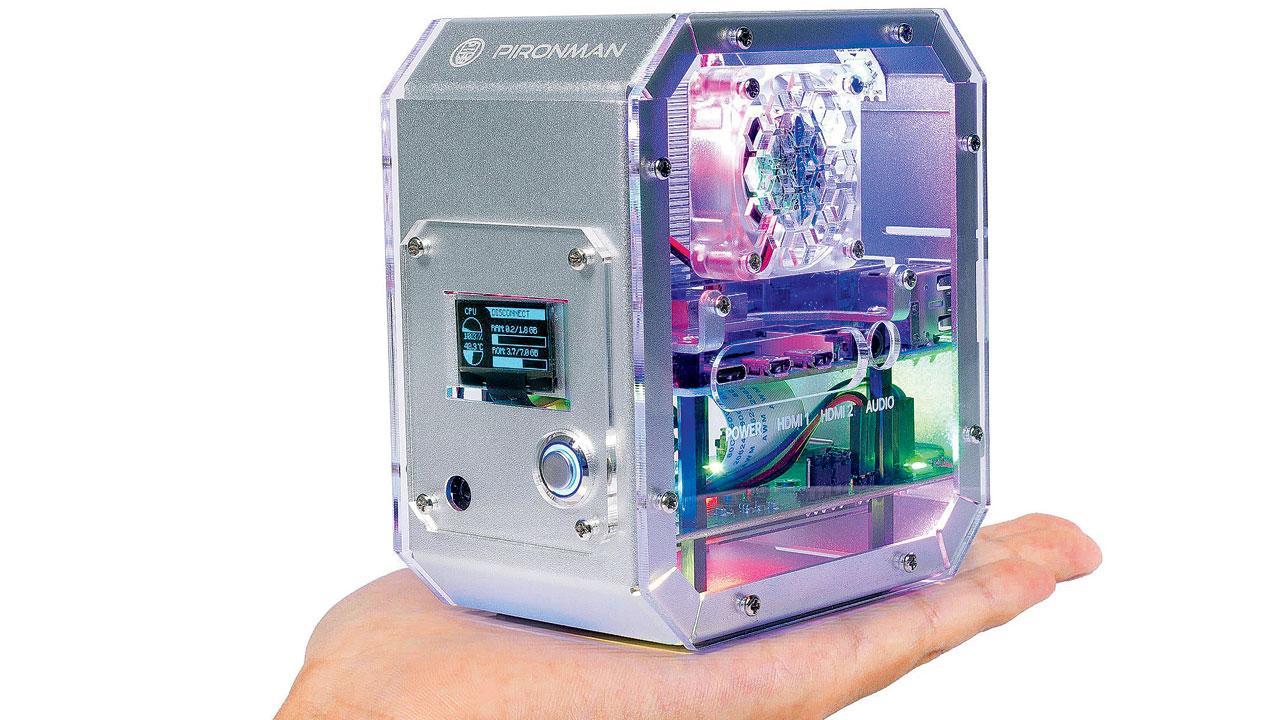
Sunfounder makes one such crazy case, and it’s called Pironman. It is definitely the Rolls-Royce of Pi cases. Several key features of this case make it very intriguing. Other than being made of metal, the Pironman comes with an extra board that integrates an M.2 SSD slot for extra storage, a clicky MicroSD slot, a power port, external access to the General-Purpose Input Output pins (GPIO pins), connection for a fan, power button, RGB LEB strip, an OLED screen and an infrared receiver on the front of the case. You also have access to all the ports on the Raspberry Pi 4, which is brilliant. The Pironman board also has integrated LEDs that light up like a Christmas tree once the software is installed.
Unboxing and Assembly
Pironman comes in a tiny box that fits neatly in the palm of your hand. Inside the box is a lovely sheet with illustrated instructions on assembling and setting up the Pironman, a bunch of parts, screws, standoffs and equipment you would need to build it. It is a self-sufficient package with lots of extra screws, cables and thermal pads in case you misplace things.
Pironman is definitely on the more complex side to assemble. It is very compact and has a lot of steps to build. While good, the step-by-step guide included in the box could be better. You are better off watching the video from their website, which is mentioned in the assembly instruction paper also listed here. It would be best if you allocate at least an hour to finish the assembly; it is pretty complicated, but no reason a novice wouldn’t be able to do it. The most complex part is attaching the various ribbon cables. Considering they are delicate, the operation needs a lot of care. Fortunately, extra cables are included in the package.
Installation and software
Installation is pretty easy. You download the Raspberry Pi installer and let it install the default Raspberry Pi OS either on a MicroSD card or a USB drive. Plug it in and boot up. Once you are logged in to Pi OS follow the detailed instructions on installing the Pironman software in Linux. This may seem complicated, but the instructions provided are very good. So, it is fairly easy to do. As soon as this is installed, you will see the Pironman light up. All the LEDs on the cabinet and the secondary board will light up. The fan will also occasionally power up, and most importantly, the front OLED screen will start working.
That said, these instructions currently work only with Raspberry Pi OS. However, I spoke to a Pironman representative, and they said they would be creating similar software for popular Pi Linux distributions like Libreelec, Retropi and Ubuntu. Pironman will also support the hardware in the Pironman for three years, which is excellent. If you are slightly more advanced in your computer knowledge, it is possible to turn on everything on your own as well.
Final Verdict
The Pironman is one of the most impressive cases I have seen for a Raspberry Pi. However, it is pricey at $79. Going by what you get in the package, it feels well worth the price. The case is sturdy, made of metal, and everything fits in like Lego. This case will serve you well if you plan to use the Pi as a PC, for home automation or even as a server. The additional support for an M.2 SATA SSD takes the utility to the next level. For more rugged applications, though, this case might not be suitable, especially if it is exposed to the elements or has to be outdoors for a long time. Another problem is this case is not available directly in India, which means it has to be imported either from China or from the US, all of which add to the cost of this case. It is still worth it if you want the best for your precious Pi.
On the Web:
Pironman: https://bit.ly/smdpironman
Where to buy: https://amzn.to/3TSr30C
Assembly video: https://bit.ly/smdpironmake
Stay connected with us on social media platform for instant update click here to join our Twitter, & Facebook
We are now on Telegram. Click here to join our channel (@TechiUpdate) and stay updated with the latest Technology headlines.
For all the latest Technology News Click Here
